Showing posts with label healthier. Show all posts

Friday, January 3, 2014

Paleo Carrot Cake

I wanted to share this wonderful little gem I found. I shared it on Instagram awhile ago (OK I picture teased, same thing)! I wanted some thing to go with my tea as a treat. I am a little over almond flour right now. Some times I don't love the texture, not appropriate for all recipes. I love my almond flour for cookies.
Working with coconut flour presents a challenge. That stuff loves to absorb any fluid you add. Here is my absolute no fail find! My fist try, perfection, definitely had to share with you.
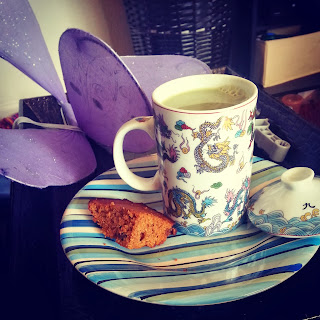
Best thing I love about this cake is you can sub your coconut flour for protein powder. YOU know I love cooking with it. (See this little protein cake for one here.) This Carrot Cake was moist, and stayed moist. It didn't even taste like it was 'healthy'! It stored really well too!
I did not use protein powder first time around because I fear its too sweet and would take away from the true carrot cake taste. But I will try it this next time around, because OMGPaleos' cake is actually a breakfast protein cake.( I can do that with breakfast!) But with coconut flour it becomes an any time cake. I love it with Matcha green tea in the afternoon.

♥ENJOY!♥

Paleo Carrot Cake
adapted from Carrot Breakfast Protein Cake.


Ingredients
  • 2 large carrots, finely shredded
  • ⅔ cup almond butter
  • 2 eggs
  • 3 tablespoons raw honey
  • 2 tablespoons coconut flour OR 35 grams (or 1 heaping scoop) Vanilla Whey Protein Powder
  • 1 tablespoon cinnamon
  • ½ teaspoon baking powder
  • pinch of salt
  • ½ cup raisins
Instructions
  1. Preheat oven to 350 degrees.
  2. Shred carrots as thin as possible. Place in large bowl. ( I used a food processor worked like a charm)
  3. Add almond butter and eggs and mix well.
  4. Then add honey, protein powder, cinnamon, baking powder and salt and mix well.
  5. Fold in raisins.
  6. Grease an 8×8 glass baking dish with coconut oil, pour batter into the dish and place in oven. Bake for 35 minutes or until the top of the cake has a nice crust to it.
  7. Let cool before cutting.
Notes
The original recipe made 8 servings, I cut mine smaller in an 8 x 8 glass dish  to make 12 servings. 

My recommendation:  (and I will always say this) get a hand held emulsion blender! It will mix your paleo treats better, faster, with less mess. You really want your ingredients mixed to truly appreciate, and taste the natural flavors. 

Wednesday, July 31, 2013

Cherry Mama's Paleo Chocolate Cherry Bombs


I am just enjoying my afternoon snack while my kiddos nap. I love mommy time. This time of day is very easy to undo how hard I worked all morning. 

But today had *nom nom* not Bon Bon! 

My newest treat is chocolate! *gasp* Using nothing but the most basic ingredients you can become a chocolatier. ( I so feel like one now.)  Sometimes  I think I eat Paleo because I want to be difficult challenged.
The basics of Paleo Chocolate is just coconut oil, cocoa, and honey. Yup. That's it. But I decided to dress it up a bit. Why not. I have always loved dark chocolate and fruit.I don't know what it is about that pairing! *Drool*


They got sort of messy when they didn't need to be. I couldn't find my silicone tray. Which would of been adorable because they are cute little stars.  I just had foil cupcake liners and I had to manipulate them a bit.  I think they look like Hans Solo frozen in carbonite. 


Cherry Mama's Cherry Bombs
1/4 cup raw unrefined coconut oil
1/4 cocoa powder (as pure and natural as you can find it)
2 tsp. Raw unfiltered organic honey
1 tsp of Maple extract
Cherries 


Melt oil,with honey and optional extract over stove, low heat, you don't want it to boil. Add in  cocoa powder use a whisk or fork.( I recommend using extract, because decadence is the point here). Plus pure cocoa can be a bit bitter for some. I used maple because it reminded me of the filling in those assorted chocolate trays :-)  It went amazing with the cherries. Place your cherries in your silicone tray or foil cups and pour chocolate over them. Move quick because if you dilly dally it starts to set in the pan and it can get a chunky look. Which happened to me, because I was dicking about with the foil cups! Let them set in the fridge or freezer for about 30 minutes. Then *nom nom*. Keep in fridge.

The base recipe
1/4 cup raw unrefined coconut oil
1/4 cocoa powder (as pure and natural as you can find it)
2 tsp. Raw unfiltered organic honey
1 tsp. of Pure Organic Vanilla Extract (optional)

The base recipe
1/4 cup raw unrefined coconut oil
1/4 cocoa powder (as pure and natural as you can find it)
2 tsp. Raw unfiltered organic honey
1 tsp. of Pure Organic Vanilla Extract (optional)

Want more?


Repeat process, this time add orange extract!
The possibilities... endless. I love playing with extracts, I went to the store the other day and I was just in awe of all the flavors available. Too many ideas, I could spend a fortune.
But some basic favorites:
Shredded coconut with Almond Extract
Almonds, with Almond...
Dried fruits with what ev!

I bet you have Almond Butter? Are you ready for big time Paleo Food Porn!!!??? Check out these naughty *nom noms*
Oh I just died... best photo project today. I have had no breakfast or lunch because of all my hard work here;-)

For almond butter cup, I used my base chocolate recipe, with vanilla extract. I didn't do almond I was afraid there wouldn't be any separation of tastes from the almond butter and chocolate. But by all means 'go nuts'. I am sure I will go down that path eventually. 

So don't laugh had to line my muffin pan with tin foil! But it worked perfect. Mkle up a batch pour in your cups, let set. Once hardened use 1/2 tsp of almond butter. Put a dollop in the middle and spread it out a little, but not to the edge. 
I know foil... it so worked!

After adding your almond butter put back in the fridge  while you make up another batch of chocolate. (I only say this because its 90 degrees outside things were getting a bit oily.) Whip those puppies back out and pour your chocolate. Optional add almonds to the top. Toss back in the fridge. Should set in about 30 minutes. I so a little prod test if I am getting a bit 'ancy in the pancies'. 

Did I tell you I LOVED this photo project! 
Maybe a little too much.