Showing posts with label chicken. Show all posts

Thursday, August 22, 2013

Easy Crock Pot Pesto Ranch


This week is my back to school week for my big kid. And that adds one more lunch into the mix. I send off my hubby with his (he is super easy), my toddler (picky cracker and air eater), and now my 3rd grader. I'm getting good at throwing stuff into bags real quick during bath time to be done with it. But I stumbled upon a tasty crock pot dinner, that does double duty as lunch!This chicken is so flavorful, it also falls apart into stringy chicken. It just asks to be used in many ways. Holla!


 I incorporated the healthier DIY version of ranch mix... HOLLA! (I am in a holla mood, so feel free to holla back).

FYI it's OK to publicly display back to school happiness.
This is about right. I love this picture. Holla for this Chick... (click to see her blog)♥

This recipe can be easy to change up for the size of your family. Change the amount of potatoes for your needs, or add extra chicken! I switch it up depending on if I am serving a whole meals from the crock, or pre-making lunches. The ingredients are easily changed for your needs. Don't sweat the small stuff.


4 chicken breast

4 medium potatoes
3 large carrots (optional)
7-8 ounces of pesto (small deli tub)
1/2 cup chicken broth
3 tablespoons ranch mix (or more to taste)
Light olive oil to coat
Sea salt to taste

Lightly spray your crock with non-stick cooking spray. 

Cut your potatoes in to 1 inch pieces (I am not a peeler, I try to retain as much of the nutrient value as possible!)
 Place potatoes in bottom of crock (or a mixing bowl, they will need to be coated I went to town in my crock.)
Cut carrots, set aside.
Fillet the chicken for smaller pieces place in a mixing bowl
First lightly coat your potatoes in olive oil, use your hands to get the oil evenly distributed. 
Now do the same to your chicken.
Add your pesto and ranch mix to the chicken again using your hands to make sure they are all coated. This will be messy. 
See all that mess stuck to your hands, grab your taters and rub a dub dub!♥
 I essentially cleaned all the left over pesto and ranch off my hands on to the potatoes. Best decision ever! Feel free to add more ranch too, I did.  I really just kept on adding until I had a nice coating! Since I make my own ranch mix I had to Google how much is in a ranch packet. 3 tablespoons is a good starting point.
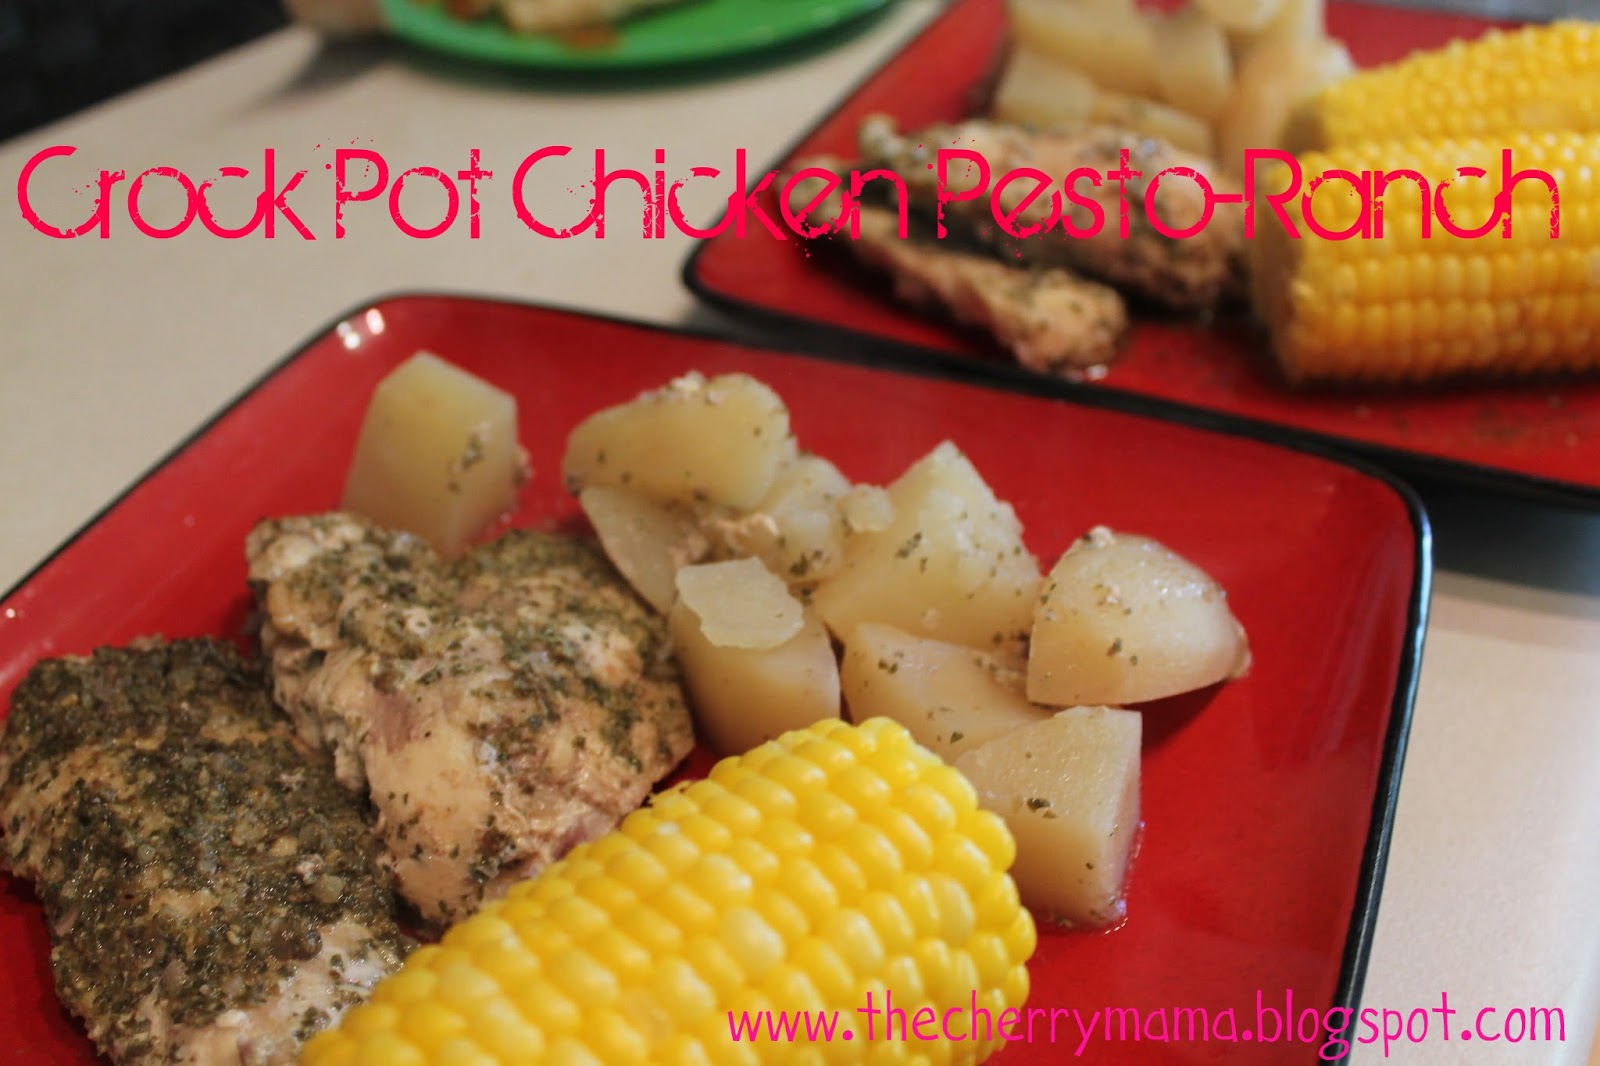
Add a layer of carrots over the potatoes (my first batch [pictured] , I steamed corn on the cob!)
 Pour in the broth,  add  chicken.( I add my broth before the chicken is because I want as much of the pesto and ranch to stick... hence the use of glue oil).

Crock it for 5-6 hours, until your veggies are soft. 

It just gets better... 


The day after was when I got an unsolicited rave review from hubs about his sandwich!
 Holy smokes!

All I had on hand was frozen hamburger buns. I threw them together with butter,  a piece of salami and mozzarella cheese  (Hubs loves his salted meats). I tossed them back into the freezer individually wrapped before the bun defrosted  (that quick girl).  A great pre-made lunch option!

Another left over lunch idea (used  for my 3rd grader)
.
♥A cold noodle salad. All  that is needed  make up some noodles, toss with oil, add  chicken. (That will get the yumm-ness all over the noodles). Top it off with a few olives and cheese (parm or mozz).

♥For the picky toddler: (she just likes cold chicken). Done. Added crackers, and apple sauce. 


♥And for Mama, cut up or shred chicken and sprinkle on a spinach salad.


I hope you enjoy, it's nice to see you.


Monday, January 28, 2013

Sexy Chicken! You dirty bird. And getting ready for the week!


I know, that was foul. Yeah, I went there. 

Every Sunday I prepare for the week. I like to get a whole chicken in the oven or crock, and bread made for the week. My husbands lunch staple it a rotisserie chicken sandwich. All home-made of course, along with his granola bar, and some other baked goodie. It seems a lot to do, but bread is super easy when you are using my quick bread, and in oven rotisserie.

It's all in the timing. I like to get the chicken in  first thing in the morning. That way it's said and done, and if I don't cook another thing all day... there's dinner done too!

 So you wonder why I call it Sexy chicken... well it's mainly how he went into the oven. I decided to remove all the skin for the hubby so I can get it super crispy all the way around.  Well, after I skinned the thing Mr. Chicken was a bit all over the place. Every time I put him in his pan his legs would flop open and over the sides. I didn't have any roasting tie to bind the legs and arms, but that's OK, it would have been a little too Shades Of Grey. There was still a lot of poking and rubbing to come. So the only way I could contain him  was pose him seductively like a man on a bear skin rug. Or Stan Lee on a couch. 


There you go. Stan Lee on  couch.
There you go. Stan Lee on couch.

There you go. Sexy Chicken.
It was a risk taking the skin off because you do run the risk of it being slightly drier. But the rotisserie rub created an all around crispy shell. Pretty cool. I prefer the skin on for a more sticky rotisserie taste.

Original recipe makes 2 whole (4 pound) chickens

Sticky Rotisserie Chicken

  • 4 teaspoons salt

  • 2 teaspoons paprika

  • 1 teaspoon onion powder

  • 1 teaspoon dried thyme

  • 1 teaspoon white pepper

  • 1/2 teaspoon cayenne pepper

  • 1/2 teaspoon black pepper

  • 1/2 teaspoon garlic powder

  • 2 onions, quartered

  • 2 (4 pound) whole chickens

Mix all your spices in a small bowl to make the rub. Wash and pat dry your chicken. Stuff your onions in the body cavity. Rub mix over entire body. Not you the chicken.  Place in roasting pan, bake at 250 degrees for 5 hours uncovered.

*Tip: The local grocery store actual prepares their chicken 24 hours ahead! Rub your mix on your chickens and place in an air tight plastic container over night in the refrigerator. The spices react with the skin to really create that super stickiness! *NOM NOM* 

Chikka- chicka bow bow...
If you did your chicken in the morning, you now have the afternoon to play,  make bread and treats.

The 'go to' bread I make is so diverse. It can be used for rolls and pizza dough :-) I use half of this recipe to make 2 pizzas. But to do sandwich rolls and pizza use full amounts.


  • 2 ½ C warm water

  • 6 Tbsp sugar

  • 3 Tbsp yeast

  • 2 Tbsp oil

  • 6 C flour (can use white or whole wheal)

  • 2 tsp salt

  • 1 tsp baking powder

Stir water, yeast, sugar and oil together. Leave for 5 minutes until it becomes frothy on top. Add flour, salt and baking powder. Mix well. Knead. Roll out if making a pizza base or shape for use as buns / bread / loaf. Bake at 350 degrees for 10-15 minutes. Keep your eye on it, times will differ for rolls and pizza dough. My pizza base took about 15 minutes. If you are making bread or rolls paint the tops with butter when they come out of the oven, delish!

Before it went into the oven I rubbed them down with chopped garlic.

The pizza bases came out so puffy, and the garlic looked delish! I am thinking Naan Bread!!!!

Quick bread pizza
All done! I had a white pizza with chicken, and the hubby had a traditional pepperoni pizza.

Now you have had your lunch. *NOM NOM* If you are not in a coma, or have made a mess by now time to kick out the granola bars. A favorite in our house. I bought a dented can of pumpkin awhile back for 64 cents.  I figured now would be a great time to try it! I have never used canned pumpkin, or tasted, and I hate pumpkin pie. But pumpkin spice lattes are my crack... I know I'm an odd cookie huh? So searching around I found a few recipes, so as usual I smashed them all together to make this:


The are so fun to wrap up in wax paper to add to lunches.

  • 2 cups old-fashioned oats

  • 1 tsp. cinnamon

  • 1-1/2 tsp. pumpkin pie spice

  • 1/4 tsp. salt

  • 2/3 cup pumpkin puree

  • 1/3 cup agave nectar

  • 3 tbsp. maple syrup (I did not have so I used some more agave, and added a tsp. of maple extract.)

  • 1 tsp. vanilla

  • 1/3 cup almonds, roughly chopped (I don't use nuts because I feed these to young ones)

  • 1/3 chocolate chips, Dark chocolate is a wonderful complement

  • 1/3 cup dried cranberries

I like to mix all my ingredients together BEFORE I add oats, nuts, chocolate, and cranberries. I like to use the whisk attachment on my mixer first. Really whip it up so it's blended and you have a nice glue for your bars! I change to the paddle attachment and fold in the oats, I do it slowly because I don't want my oats pulverized. Then slowly fold in your mix-in's . If you like your bars loaded with everything keep an eye on the mixture. Too dry and they wont stay as a bar. You can drizzle in more agave if needed.  Press into a greased baking pan, or glass dish. Bake at 350 for 15-20 minutes, until you have a golden crisp around the edges.  Let cool thoroughly then slice up in the pan, or flip onto the counter. I used a pizza slicer, works like a dream to cut!
Enjoy, you have goodies done for the week.♥