Showing posts with label Easy crafts. Show all posts

Tuesday, November 19, 2013

Maxi Dress into A Boho Skirt


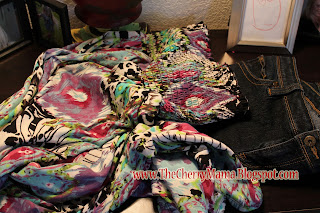
This can be an easy or as difficult you would like it to be. For my practice one I used a simple cotton maxi dress. I wanted practice before I attempted cutting my favorite Boho dress (that I have had since 2005). The elastic around the chest is long gone. But I knew it was destine to be amazing, to be reincarnated!

If you did the previous Denim Maxi skirt project you had a pair of strange shorts left over. This is the prettiest way to use them! 

Cut the denim just under the back pockets. I used a ruler and some chalk for the first one.

You are going to want to cut off the top portion of  the maxi dress. This is when you will want to cut it to the length that fits you! (Psst.. if you know me by now, save that bandeau top!)

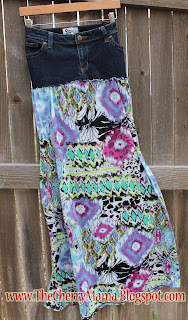
 The cotton maxi was just a plain tube of fabric. So when I pinned it I flipped it inside out so I could pin some pleats in a more even manner. I attach the skirt under the denim and left the raw edge to fray.

 Then sew! It was that easy.


So here is the one I was waiting for my Boho dress. This dress is chiffon with a slip underneath and a little more difficult to handle. I cut of the top and was able to leave everything connected and pleated. I just had to sew. The only thing I did was adjust the length to fit, and cropped the under skirt so it was shorter and now more sheer. 

<a href="http://www.bloglovin.com/blog/11345001/?claim=zkrf8mf5zc4">Follow my blog with Bloglovin</a>

Sunday, November 17, 2013

Easy Denim Skirts For All Seasons


I have wanted to do this for a long time! But like we all do, I add it to the craft wish list that is a mile long! Right? Mine is, please say yours is too, so I feel better. Thanks.

The great thing about this skirt is that I used jeans that were too big or just plain unflattering now.  We must purge these bad things from our life. My first one was a full length skirt. Love Love! Then I was packing up Summer stuff and I saw crops. These will make a great pass the knee length skirt. I'm so thinking knee boots and pattern tights! You with me now?

Problem... reading a lot of feed back a lot of attempts went South, or there were tutorials that added wonky steps. Well, I fixed this. Yeah, go me! It's the combination of being an artist with an engineering side to me.

So now let me present: the perfect patch work skirt, with no wonky bumps or sticky out bits!

You will need 2 pairs of denim, or 2 pairs of denim crops. Choose one pair to be your skirt, and the other for the patch. 
I chose the more bling bling ones as my main pair because they already had the perfect rips and cute back pockets.
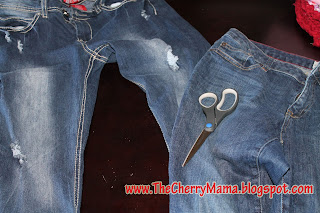
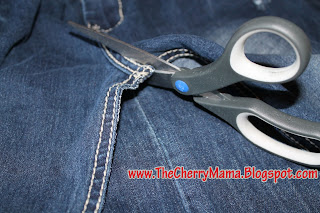
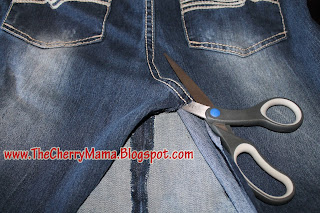
Cut open the seam on both pairs!
Take your patch pair and cut off the legs. Cut as high up as possible.


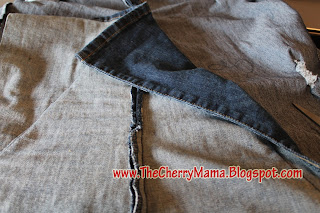
Open up your main pair and insert your patch piece underneath. But make sure you flip it upside down so you have more fabric at the bottom.


By flipping it upside down you will get a more full look in your skirt.

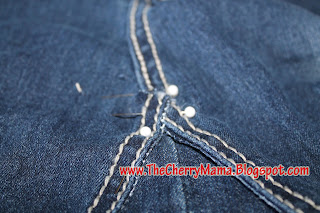
Here's a little trick! A lot of people were having a problem with the front laying flat. It's really just applying what you will be doing to the back, with a special detail. Cut up the curve just slightly, then cut out that square where all the seams come together. You want to cut enough to bring them together into a triangle so it will lay flat. 

Pin in place, and pin the rest of your skirt.
A little trick for a fuller skirt. Pinch up the middle of the patch piece, then pin.
 (Or flatten completely.) 
Before I started sewing I sewed the crotch by hand to ensure it was straight, 
and came together neat.
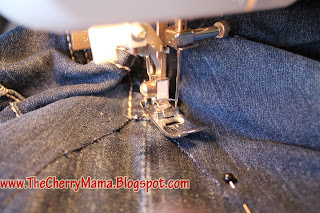
Time to sew! I chose to sew on the out side of the original pant seam. I wanted a layered look, almost like a petti coat. I also get more fraying for the Boho look.
Flip! And repeat cut up the curve on the backside. About 2 inches, or until you see it laying flat. Cut again on the other side of that seam to remove! 

You now have that extra fabric, starting at the bottom, cut to remove.
 I used a ruler and drew a line with chalk so I didn't do an 'oopsie'.

Pin (again pinching up some fabric for fullness if desired) and stitch! Again I left the raw edge and a small allowance to allow for fraying.  You can just leave the fraying for the front and tuck under a hem if you wish.
Now flip inside out and cut away all that left over fabric from the patch! 
Cur around the bottom and wash to fray. You're done!
Here is my skirt from the crop's and my jeans. These are my Instagram pics. Follow me there to see my projects as they happen. 

I have received nothing but compliments from these skirts! (Even cute old Veterans in Rascal Scooters.) LOVE LOVE. 

Thursday, February 7, 2013

Valentines Challenge, toddler crafts, and DIY puffy paint.

Currently I am participating in a VDay challenge in one of the Toddler Groups on CafeMom.com

Very fun and cute, now my little one expects a project nightly. Yikes, is it possible to create a bigger monster? Yes.

But they also make great little gifts for those loved ones far away, or not. 

Day one:

HUGS! Simple enough, trace little ones hands, or hand print, onto paper. Cut out and add string or ribbon thats the same length as their arm span. Mine look cute hanging on my refrigerator right now but they are so light weight I could send them around the world for next to nothing.
Send Hugs!

Day Two:

Easy Yum Yums! The CM post was originally all about the puffed rice. I don't have those in our house. So I opted to use Puffed Red Wheat. Not only a healthier option but a buck a bag @Wal-Mart.  I don't own a heart shaped cookie cutter (*gasp*) so we kept them in squares. On top we ( the Hubs, he's my chocolatier) melted white chocolate, and sprinkled on white chocolate chips and some heart shaped sprinkles. They tasted de-lish.
Puffed Wheat Treats

Day Three:

Heart Art

Our weapons of choice were heart shaped sponges, and Q Tips for painting. This one was a fun hot mess. My little girl opted for the more messy of the two, the sponge. She just couldn't create a big enough mess with a Q tip. Who could blame her.


Image 
Painting after a bath, way to go Mom got that a little backwards!
Day Four:

A card that blows kisses

Now this is where I got savvy. The original CM post was just to use construction paper for a card, glue a picture on the front and have their hand flip down with a message. Now keeping close to the theme I decided to use the pretty paper we made yesterday. I took two of the sheets and glues one to scrap book paper. The second I glued over the top, but just a line of glue so you can lift it up. I took the pictures I was going to use and trim them up. I got a little into details and use their heads as the top of a heart. I placed them on the top layer where I would want to see them. I traced a heart around them, then cut out the heart, creating a window. I drew an outline of the window onto the bottom paper so I had exact placement. Taking either a trace or hand stamp I placed that over the window, so when you flip it down it reads; "Bowing kisses..."  

Then we wrote on the inside with greetings. It turned out so adorable I added some ribbon so it can be hung up. Pretty Cute. 

ImageImageImage

Well I can't wait for the rest of the challenges! Because they are a great distraction... I was so in recipe development fun. 

I would love to add:

The paint I use, it is super simple and I love the consistency. It's closer to a puffy paint and great for use in squeeze bottles. But It was wonderful for sponge painting and making a mess. It didn't drip, and if my baby rolled over to check it out it wouldn't be as disastrous if he took a taste. He tried it already with our homemade play dough. 

Another good thing about this recipe you can make up as much as you need too. I halved it so I could pour what I need into a paper bowl.


1 c. salt

1 c. flour

1 c. water

a healthy squirt of food coloring