Showing posts with label Craft. Show all posts

Sunday, June 30, 2013

My first 'Rag Rug' , placemat.


Since I have been accessorizing the entire house I have been in a see-it, make-it mood. My newest addiction is rag rugs. I have always like the look of them from when I worked at Anthropologie. But they never fit my decor (back then). But now I have the opportunity to add them into the mix. 
Once I saw enough pretty rugs and other rag rug projects I figured it was time to try. I find out there are many ways to tackle the project (and I just might try them all). I picked an easy one to start off with. Very simple, pretty quick (for Rag-Ruggin' that is),the braided 'Rag Rug' Method. It being my first time I thought placemats for my new table would be great place to start. 
This is a great opportunity to go through and clean out your old soft bed sheets, or pajamas, or pajamas that were bed sheets. Remember these? One seam PJ tutorial, made even easier! Made from bed sheets.
They are now living as a 'Rag Rug', they have been given a third life. Now that is recycling at its finest my friends. 
What I am sharing is how I did it,  for my first time I took the longer route! (I have no patience people I wanted to see my creation faster and not prep my rags). But don't worry, I won't make you do that, I will also  tell you what NOT to do. 
Getting your raw materials
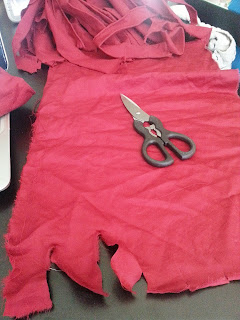
First, grab your material, make cuts about one inch in, and one inch in width. And start ripping. Just go nuts. I used two pairs of PJ's for one place mat and still have rags left. 

Now you have a pile of matched, or mismatched rag strips. This is where a time saver comes in. Make rag strip balls first! Take some time and sit at your sewing machine and attach them into one big ribbon. I know you want to get started, just stop, and sew. Hand sewing is fine, thats what I did, as I braided, I would just add as needed. LOL, terrible! Once you have attached your strips wind them into a ball. 
*Another note, it doesn't matter that your patterns in your ball match. You can do your solid color, and a pattern. Or just grab and sew. I am going to just grab next time!

So now you have your rag yarn. Heres where you can go one of two ways, I braided (you will need three rag balls) or crochet (on big crazy ball). I wanted more of a pattern, so I went with braid. 


Starting the braid
Don't do what I did, tie them together in a knot to start. I so forgot to go back and undo the knot and sew it together. Now I have a knot in the middle and I can't use it as a centerpiece mat for a vase. Oops. So take your three pieces and sew together. Anchor under something heavy (get a clamp, it rocks) and braid like theres no tomorrow. My mat used 18 feet of braid! Do not make your braids tight, it will not lay flat when it comes time to sew.


Making your mat, coaster or rug.
 I was reading tutorial after tutorial. It's simple if you have done these, and make sense once you start. LOL, if you haven't done these before (like me) I hope I can help you. Because many tutorial just didn't make sense, even with a picture (HA HA). So I hope my handy dandy pictures help. 

Starting your mat you want to start rolling, pins can help. For me I found they got in the way (ouch). You want to zig zag your stitch, and hide your stitches in the braids. I used upholstery thread because it's easier to deal with if you get tangled, and very durable.


 I like sewing outer braid in. Only because when you need more thread its easier to tie on and off, and you have more maneuverability. When sewing out to in you don't have to hide the stitch going in until you get to your final row, then you want to hide that in a fold. When you think you're getting close to the end just wrap your remainder (for a visual) and mark your braid with a pin so you know when to start hiding the outer stitch. 
Totally ignore my odd stitching in the middle... it was an experiment! Ha. 
But this is how to hide your stitch on the outer braid.

Rag rug projects are pretty fun. Once you start, you'll get it, there are so many things you can do. As I was sewing I was thinking of different patterns, and colors. You can also add  some rubber backing to your rag-mats, coasters and rugs to make them functionable.

Thursday, June 13, 2013

Been gone too long.

Between my sons first birthday, New phones, and laptops I have been busy. My son's birthday took a week of preparation,  and now I am working on redecorating the house. Inspired by my new obsession: Bohemian. I have boxes everywhere,  project s fill the table and I can't get to my pictures because we are having transfer issues.  So I am blogging from my New phone because I can take new pictures of my new craft projects.
I am very excited to share!

Saturday, March 30, 2013

One seam PJ's and a use for old bed sheets, a Camera phone tutorial!

Only I can take the easiest PJ tutorial, and find a short cut. But I personally am proud because I am calling it a repurpose (sneaky cheat move).

I have accidently held on to some bed sheets that just don't fit any of the beds in the house, and my eldest daughter has grown out of a set too. I also didn't want to spend any money on making PJ's pants. I had some old Nightmare before Christmas sheets and I knew I had to use them for something. I was also hanging on to a link for a 'one seam PJ tutorial' link off Pinterest. I had to give the tutorial a try before I moved to the sheets. I used some remnants I had to make my son some. He was in a growth spurt so I had to make some things to hang out in the house. Because I would be washing the few pair of nice pants constantly (he is the spit up King). They were easy to whip up. After that I was hooked! Holla! <---Said that!

The tutorial calls for a cute cuff that you can make in different but coordinated fabric. I was like, “Nuh-uuuhh, this is supposed to be The Lazy Mama's tutorial!”. Then I was like, '”Ah-ha!”. You know why? Your old flat sheets and pillow cases already come with a ready made hem, and cuff. And if you have an older nicer flat sheet might have that ribbon detail! There you go I just Lazy-ified easy! I mean I got crafty on crafty!


Lay out your fabric, or flat sheet. You will be tracing plus a bit (seam), around a pair of pants, or other PJ's. 

Fold your fabric lengthwise, this will create your first leg, and one less seam! Pa-pow!

easy one seam, ready made cuff PJ tutorial
At this moment I realized I am wearing the pants I want to trace... so it is now a, 'ass out' tutorial!

Fold your pants in half and trace and cut. You now have your pattern, use the one you have just cut, and trace again on another folded area of your fabric.

Image

Easy! Make your own PJ pattern.
When I am winging it making my own pattern I do take a moment to pin it the two legs on top of each other just to trip up and make sure it's not all out of whack!

Now you should have two legs! Open them up, sew just the crotch on either side.

easy PJ tutorial
Open them up! Then stack them.

Easy PJ tutorial
When they the two legs are on top of each other make sure they are inside out! Because next you will start to sew.

Easy PJ tuutorial
The pins mark where you will be sewing

Easy PJ tutorial
Pins show where you will be sewing first. Remember you are only sewing the rise first.

Now fold them back so you are looking at the front of them, you now have PJ chaps! Just sew the inseam of each leg. Remember you already have your bottom seams done :-)

Easy PJ tutorial
By now you are on the radar of your kids, they will be such great helpers (ahhhh!). There ya go, the rise (crotch) sewn, and folded back to look like pants.

To make a waist band, simply fold over the width of your elastic with a little room for your seam. Too much you risk rolling elastic, to tight, well your elastic just won't fit :-) Sew all the way around leaving about an inch to feed your (measured to your PJ recipients waist) elastic through by using a safety pin.

Easy PJ tutorial
Measure your waist band.

Easy PJ tutorial
Sew around creating a waist band, leave room though! You have to thread your elastic.

Easy PJ tutorial
Sew your elastic together, before you sew up the opening.

When all the way through sew your elastic together, then sew up your hole.


DONE!

Easy PJ tutorial!
Then I ran downstairs to my daughters room, only full length mirror with space. Love the haze? The toddler happened all over it! HA!Easy PJ tutorial

To see more pictures, or the tutorial with the cuff go HERE.

Thursday, February 7, 2013

Valentines Challenge, toddler crafts, and DIY puffy paint.

Currently I am participating in a VDay challenge in one of the Toddler Groups on CafeMom.com

Very fun and cute, now my little one expects a project nightly. Yikes, is it possible to create a bigger monster? Yes.

But they also make great little gifts for those loved ones far away, or not. 

Day one:

HUGS! Simple enough, trace little ones hands, or hand print, onto paper. Cut out and add string or ribbon thats the same length as their arm span. Mine look cute hanging on my refrigerator right now but they are so light weight I could send them around the world for next to nothing.
Send Hugs!

Day Two:

Easy Yum Yums! The CM post was originally all about the puffed rice. I don't have those in our house. So I opted to use Puffed Red Wheat. Not only a healthier option but a buck a bag @Wal-Mart.  I don't own a heart shaped cookie cutter (*gasp*) so we kept them in squares. On top we ( the Hubs, he's my chocolatier) melted white chocolate, and sprinkled on white chocolate chips and some heart shaped sprinkles. They tasted de-lish.
Puffed Wheat Treats

Day Three:

Heart Art

Our weapons of choice were heart shaped sponges, and Q Tips for painting. This one was a fun hot mess. My little girl opted for the more messy of the two, the sponge. She just couldn't create a big enough mess with a Q tip. Who could blame her.


Image 
Painting after a bath, way to go Mom got that a little backwards!
Day Four:

A card that blows kisses

Now this is where I got savvy. The original CM post was just to use construction paper for a card, glue a picture on the front and have their hand flip down with a message. Now keeping close to the theme I decided to use the pretty paper we made yesterday. I took two of the sheets and glues one to scrap book paper. The second I glued over the top, but just a line of glue so you can lift it up. I took the pictures I was going to use and trim them up. I got a little into details and use their heads as the top of a heart. I placed them on the top layer where I would want to see them. I traced a heart around them, then cut out the heart, creating a window. I drew an outline of the window onto the bottom paper so I had exact placement. Taking either a trace or hand stamp I placed that over the window, so when you flip it down it reads; "Bowing kisses..."  

Then we wrote on the inside with greetings. It turned out so adorable I added some ribbon so it can be hung up. Pretty Cute. 

ImageImageImage

Well I can't wait for the rest of the challenges! Because they are a great distraction... I was so in recipe development fun. 

I would love to add:

The paint I use, it is super simple and I love the consistency. It's closer to a puffy paint and great for use in squeeze bottles. But It was wonderful for sponge painting and making a mess. It didn't drip, and if my baby rolled over to check it out it wouldn't be as disastrous if he took a taste. He tried it already with our homemade play dough. 

Another good thing about this recipe you can make up as much as you need too. I halved it so I could pour what I need into a paper bowl.


1 c. salt

1 c. flour

1 c. water

a healthy squirt of food coloring 

Friday, February 1, 2013

Don't be that guy for Valentines day! Craft ideas.

 
Time is ticking people! V-day V-day!
 I love holidays!!!
Don't be a last minute person. Nothing says, "I- care -but -not enough-to -have- some -thing -planned- so- I-totally -wanna -be -that- shmuck- @- the -11th- hour -@ Wal-mart."
Last minute  
This is Wal-Mart after work for these guy's. At this point is this the right choice!
I know then the rebuttal is: It's the thought that count's. But do you want that thought about you to be associated with Wal-mart. 
So I give you guys or gals a freebie, this can only be used on V-Days that fall Monday through Thursday.
[Man comes home after work on Valentines Day, sees wife with an eager look on face.]
Man: "Oh honey. I love that look on your face. Now I just have to mess with you! It's the work week, we can't have as much fun as I would like to have with you. You're going to have to wait until this weekend."
[Man kisses wife sweetly on the forehead, lifts her chin with thumb and forefinger so her eyes met his and winks with a cheeky smile.  Exits room.]
So there's one example... Now you better sex up your significant other just to seal the deal. You now have bought yourself some time. Do not go to Wal-Mart. Good luck!
*To my husband: don't you dare! Well not the deal sealing part ;-)*
OK so with all that said, what?! Didn't I warn you some time ago now I can ramble, go off topic, and/or combine two strange things in a post.
So I went on a V-Day haul @ Dollar Store. Now most of this is for kid's, or the kid's to use for gift's. But there's some inspiration here some where.
Image 
Gift Bags!!!! Yeah... GIFT BAAAAAAGS!!!

I totally scored on the box of cards BTW because I have a "BIEBER-RIFFIC!" (ha ha ha, *gag*) step daughter so I had to get the traditional cards for school. I was also able to pick up some yummy looking lollypops too. So done and done. 
Now for the kids I put together gift bags, they live for those. I am notorious for them too. There's something about kids, and little things. I used to adore my miniature My Little Pony, and Beatrix Potter felt animals. Stuffing them in cute boxes, and bags was the best!
Image 
These things!!! They were so hard to find, I couldn't remember the name of them. Silly irony, my 2 year old is addicted to Beatrix Potter videos. Wow, Mom brain.
So now gift bags aside what to do with the rest. Now my huge idea because it's almost spring is flowers...
For quick, multiple gifts add a packet off seeds to the soil with some twine. (The seeds were 4 for $1.)The Dollar store also has gardening gloves, and gardening tools that could potentially grow into a great gift basket.  
] 

I always enjoy getting my  kidlets involved. There's no way I can keep my toddler away from a messy project! So I was thinking of  seed starter for 'started' gifts. I keep lot's of random cute jars and baby jars for this purpose ;-)
Fill jar with your seed starter, and your seeds (about half of the packet in each) add water and pack down the soil and put the lid back on. (Don't pack into a brick.) I picked up ink pads from the dollar store in red and black, and the stamps were only $1.50 from Michaels. I am now going to decorate the jar with twine from the dollar store and some Valentines stamps. Maybe use images from a magazine to make a collage. I think the plain ones are too cute. Make sure you save the packet! Work that in to a collage card that is also an instructional card. 
Image
Another idea, whip together some burlap bags place your jar in that. Use old plain tee's to make a quick bag and stamp it to match your gift tag or jar design.
Now I didn't go crazy on getting the plates and cups with  hearts. I just picked up the napkins. I didn't want to O.D. I wanted to keep it more "Me-made".  So the napkins will make a great touch in lunches along with those heart baggies. I pack my husbands and kids lunches with those hearts for a full month before Valentines day.


A lot of baked goodies goes into my families lunches, and I like to theme  my hubbies lunches for no reason. But it just so happens it works for Valentines. (I know I am a goob.)Image
[Image 
This is my hubbys lunch. Generally it's a homemade dinner, or my bread and Sexy Chicken! Yeah he even has Star Wars gummies, and Darth Vader lunch box.. It makes sound too.

For wrapping baked goods I used my stamps on paper then placed them between two sheets of wax or parchment paper. Then finished with twine. This would be great to add into a basket with your seed starters!
I have so many more things to do with this haul! I can't wait. There's those little plastic heart boxes there too... Hmmm... so many ideas in this already full chaotic head.

Remember it is the thought the counts. As in; "I think about you, I know you so well, and because I listen to you, and know what you enjoy. So I :   ___(fill in blank)_____ for you."
Because not always is jewelry, or a private flight to Paris for dinner is needed. Save those things for an average Tuesday! ;-)
Image


Monday, December 31, 2012

A Dollar Store Copy Cat Craft

My Humble beginnings...

 This little copy cat craft I did was created over the early spring, before my son was born!

We have an odd lay out in our living room, there's this very unnecessary giant ledge. We have a gas fire place, but that shouldn't have cause all of this ledge-e-ness. Who knows, it might just be a tomb of the previous owners.
 Any way, the space behind the TV seemed too open, and blank.  I saw the pictures going around Pinterest of Pottery Barn knock off mirrors, so I thought let's go to the Dollar Store.

SI got my 12 mirrors, 1 super glue, and 1 roll of duct tape, and spent $30?!  It's the Dollar Store, it has the same trappings of Target.
  It was so easy I did it preggo with a toddler at my feet. I am sure you could also be drunk, or have a hoard of toddlers it's that user friendly.

I laid out my mirrors, and began to tape the seams.

IMAG0114

 After I did  the seams I did a criss-cross action too over the back. I was supposed to get poster board, but I forgot (I was distracted) so I used our moving boxes.  I hacked up a box, glued that sucker to the back for stability.

IMAG0118

 Done. It wasn't going to be hung so I didn't bother with a hanger for the back.

 Any way, this is an oldie but a goodie.♥

IMAG0119IMAG0122
So MANY months later I had it down to clean and bloke one of the mirrors. I thought it would be an easy fix but noooOOooo... that tape was super stuck my friends! 
Now it hangs in my odd shaped laundry room where I have a foot and a half of space to open the dryer door. But it's true what they say, mirrors sure open up a room.... ummm no.
♥♥ #irony