Showing posts with label DIY. Show all posts

Wednesday, March 18, 2015

Two Ingredient Face Mask

There is no need to spend a large quantity of money on a small quantity on those expensive face creams. Save it for buying a good wheat grass, and end up with a huge quantity of healthy! I am sure you're aware wheat grass does good things for you from in the inside out. How about applying on the out side... Wheat grass can aid in skin call regeneration, complexion, treats eczema and skin discoloration. Hello fabulous! 
Now couple this with the power of raw honey, and this two-fer is legit! 
Honey alone is already amazing for your skin, loaded with antibacterial and anti fungal power. But it is a humectant, which will draw moisture into the skin. Raw honey will calm the redness and fade scars, how can you not be using this!
Putting these two together are a "no brainer" right!
Mix teaspoon of wheat grass, with a teaspoon and a half of raw honey. Add more if needed to make a good sticky consistency. Mine was pretty dry until I added more. Apply with a spatula or a face brush if you can.  I do keep a box of latex gloves around, they come in handy if you like to do face treatments.
Wear for up to 20 minutes, and try not to move too much! Your body heat will warm the honey and it will drip! Keep a towel handy. Wash off with luke warm water with a soft face towel. try not scrub it off. You will want a nice layer of honey residue, it will act as your moisturizer.
If you wish you can do this a few times a week, and also pair it with:  Home Made Honey Cleanser !

Tuesday, December 17, 2013

EASY owls!


You will not need anything too fancy for these little guys. 2 triangles of various sizes. Totally free cut! Best way to use up scraps. They are great for ornaments, or fill with potpourri for drawer scents. They make cute gifts, or add on to gift labels. 
 One pattern will be his tummy..


 I cut the tummy, then laid it on the fabric to get a 'guestimation' of size. 
hen took the body fabric and folded it over. (One large triangle, one less seam)

 Then cut larger than your tummy piece. 
 Ta Dah! I didn't measure so they all will have their own personality. 

SEW!

 My pin cushion meeting his new friend! Did I mention, great pin cushions!
 He needs a nose, fold, pin and just run a seam where the pin is.
 Then from the inside sew his beak down. Or glue. 
 Add eyes! I have used felt, buttons, beads, sequins....
 If you are making an ornament sew some embroidery thread through the top of the head.
 Before you sew the beak down.


STUFF!
 SEW!
 Glue a circle of felt to finish.
 DONE!
 OR: Glue in a nice parcel finish.
 DONE!

LOL, look at this motley crew!

Sunday, November 17, 2013

Easy Denim Skirts For All Seasons


I have wanted to do this for a long time! But like we all do, I add it to the craft wish list that is a mile long! Right? Mine is, please say yours is too, so I feel better. Thanks.

The great thing about this skirt is that I used jeans that were too big or just plain unflattering now.  We must purge these bad things from our life. My first one was a full length skirt. Love Love! Then I was packing up Summer stuff and I saw crops. These will make a great pass the knee length skirt. I'm so thinking knee boots and pattern tights! You with me now?

Problem... reading a lot of feed back a lot of attempts went South, or there were tutorials that added wonky steps. Well, I fixed this. Yeah, go me! It's the combination of being an artist with an engineering side to me.

So now let me present: the perfect patch work skirt, with no wonky bumps or sticky out bits!

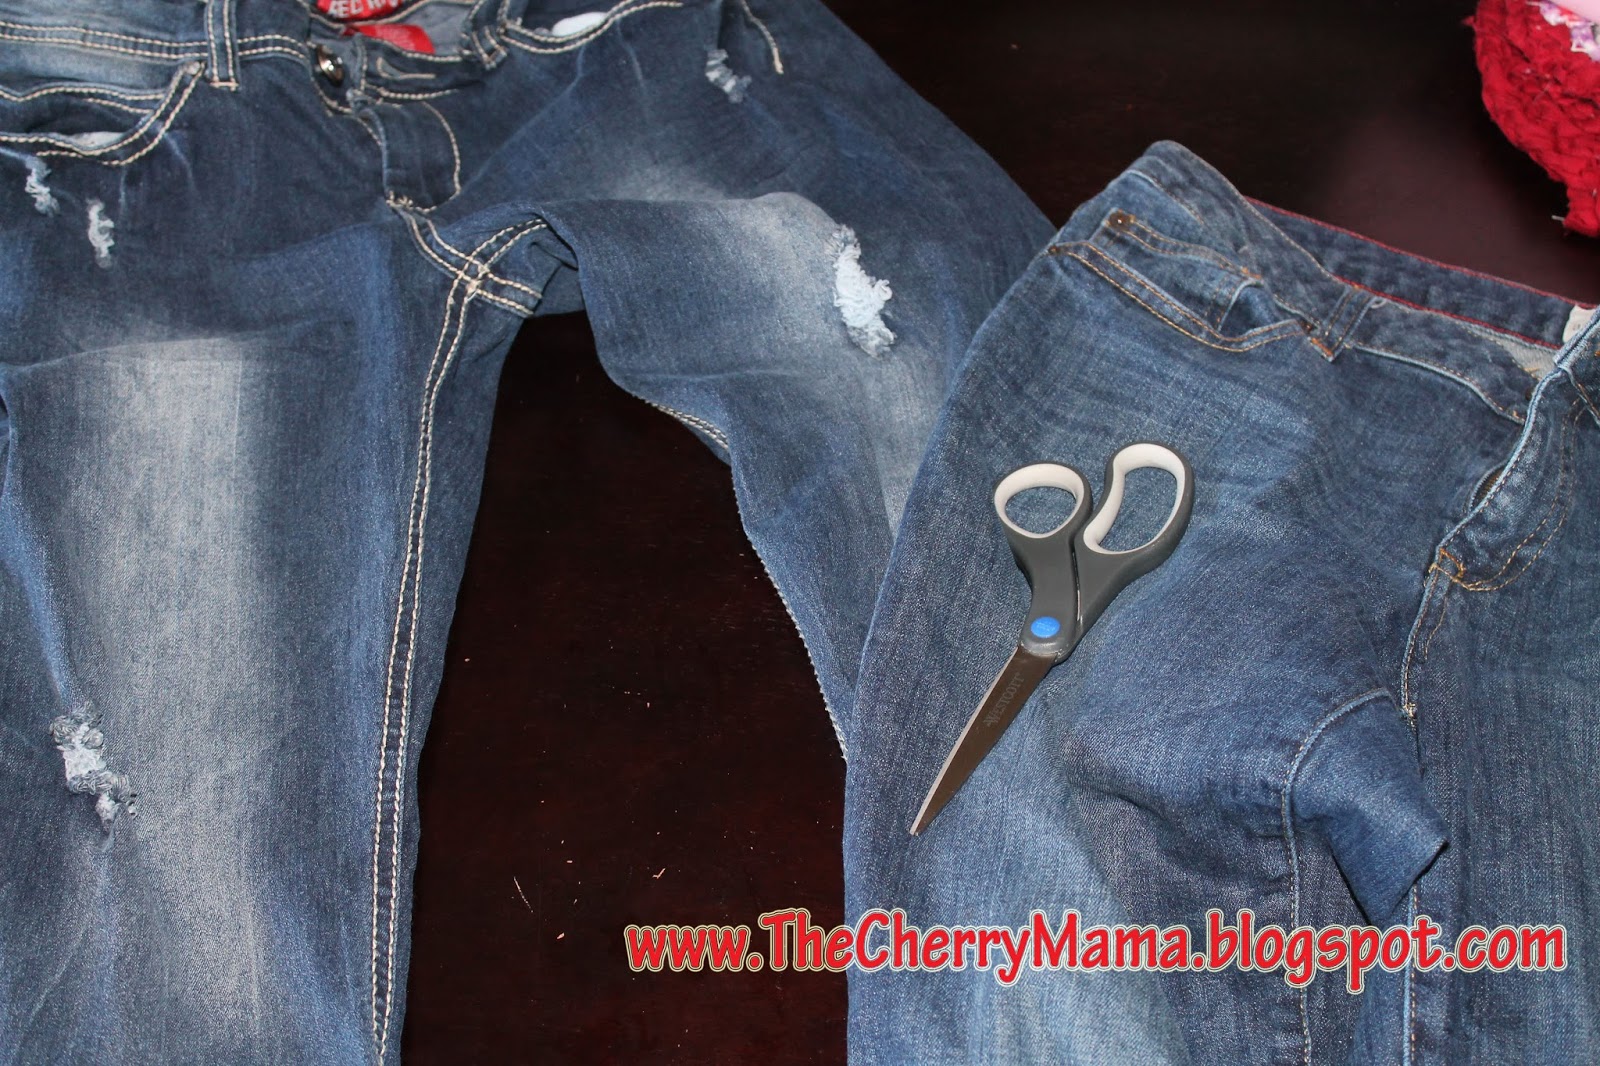
You will need 2 pairs of denim, or 2 pairs of denim crops. Choose one pair to be your skirt, and the other for the patch. 
I chose the more bling bling ones as my main pair because they already had the perfect rips and cute back pockets.
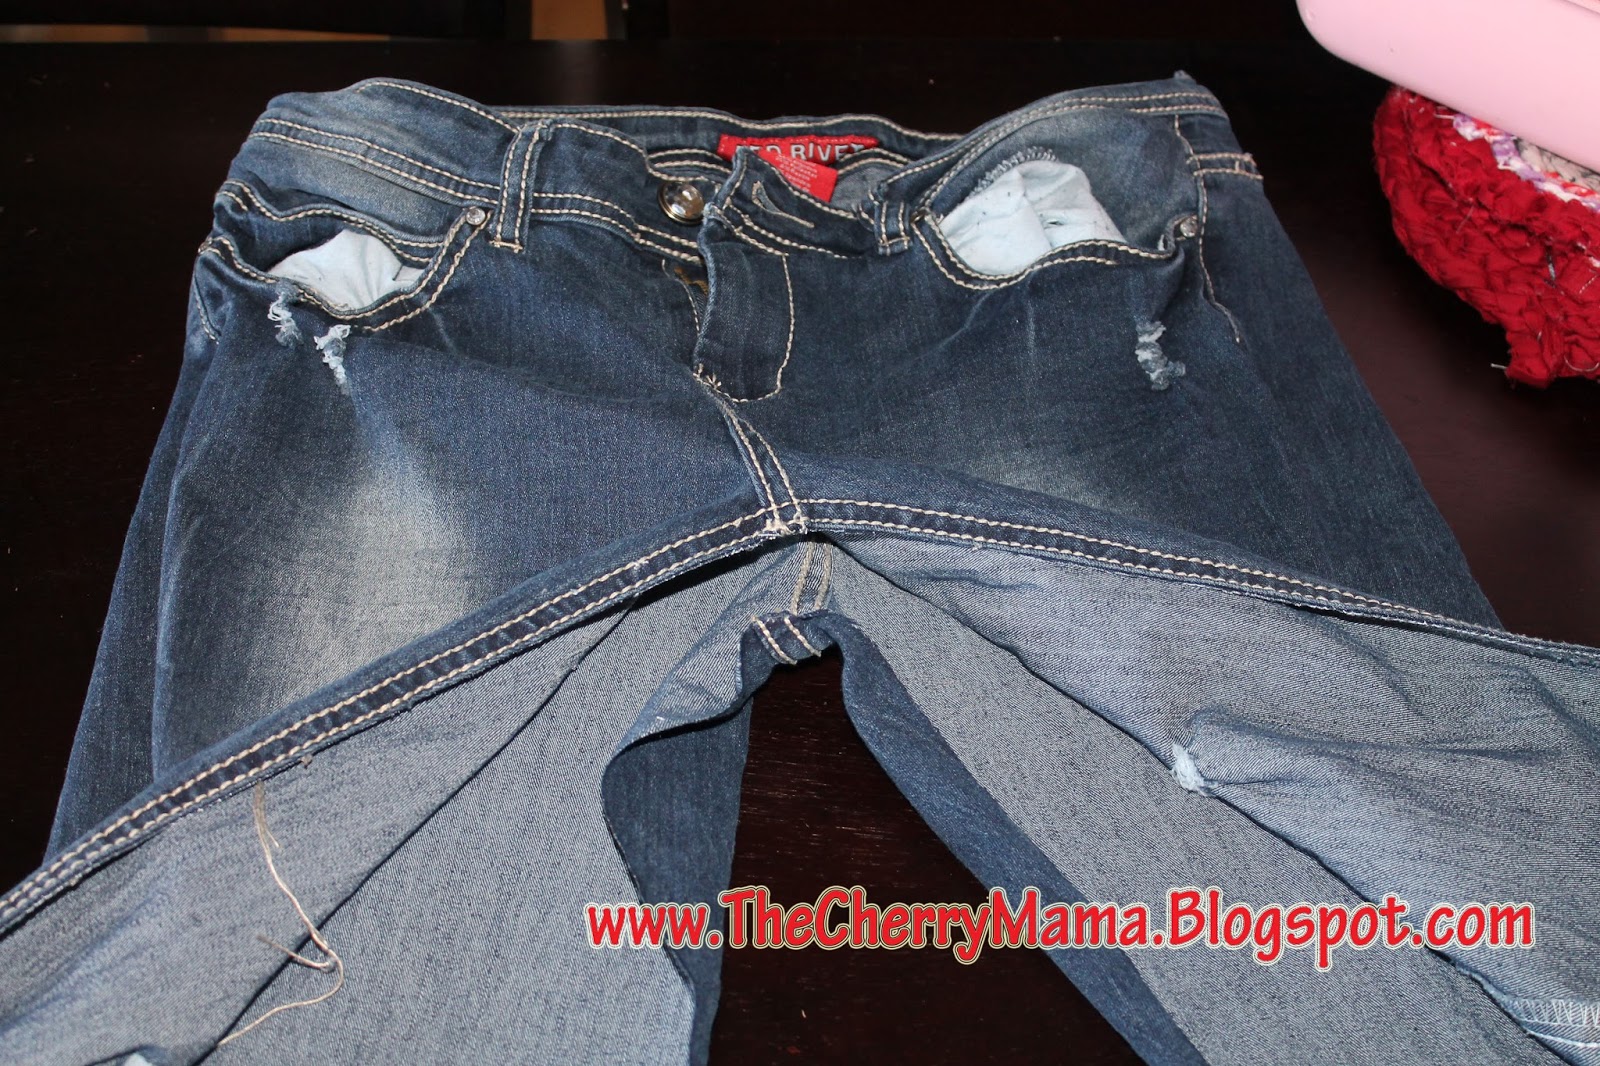
Cut open the seam on both pairs!
Take your patch pair and cut off the legs. Cut as high up as possible.


Open up your main pair and insert your patch piece underneath. But make sure you flip it upside down so you have more fabric at the bottom.


By flipping it upside down you will get a more full look in your skirt.

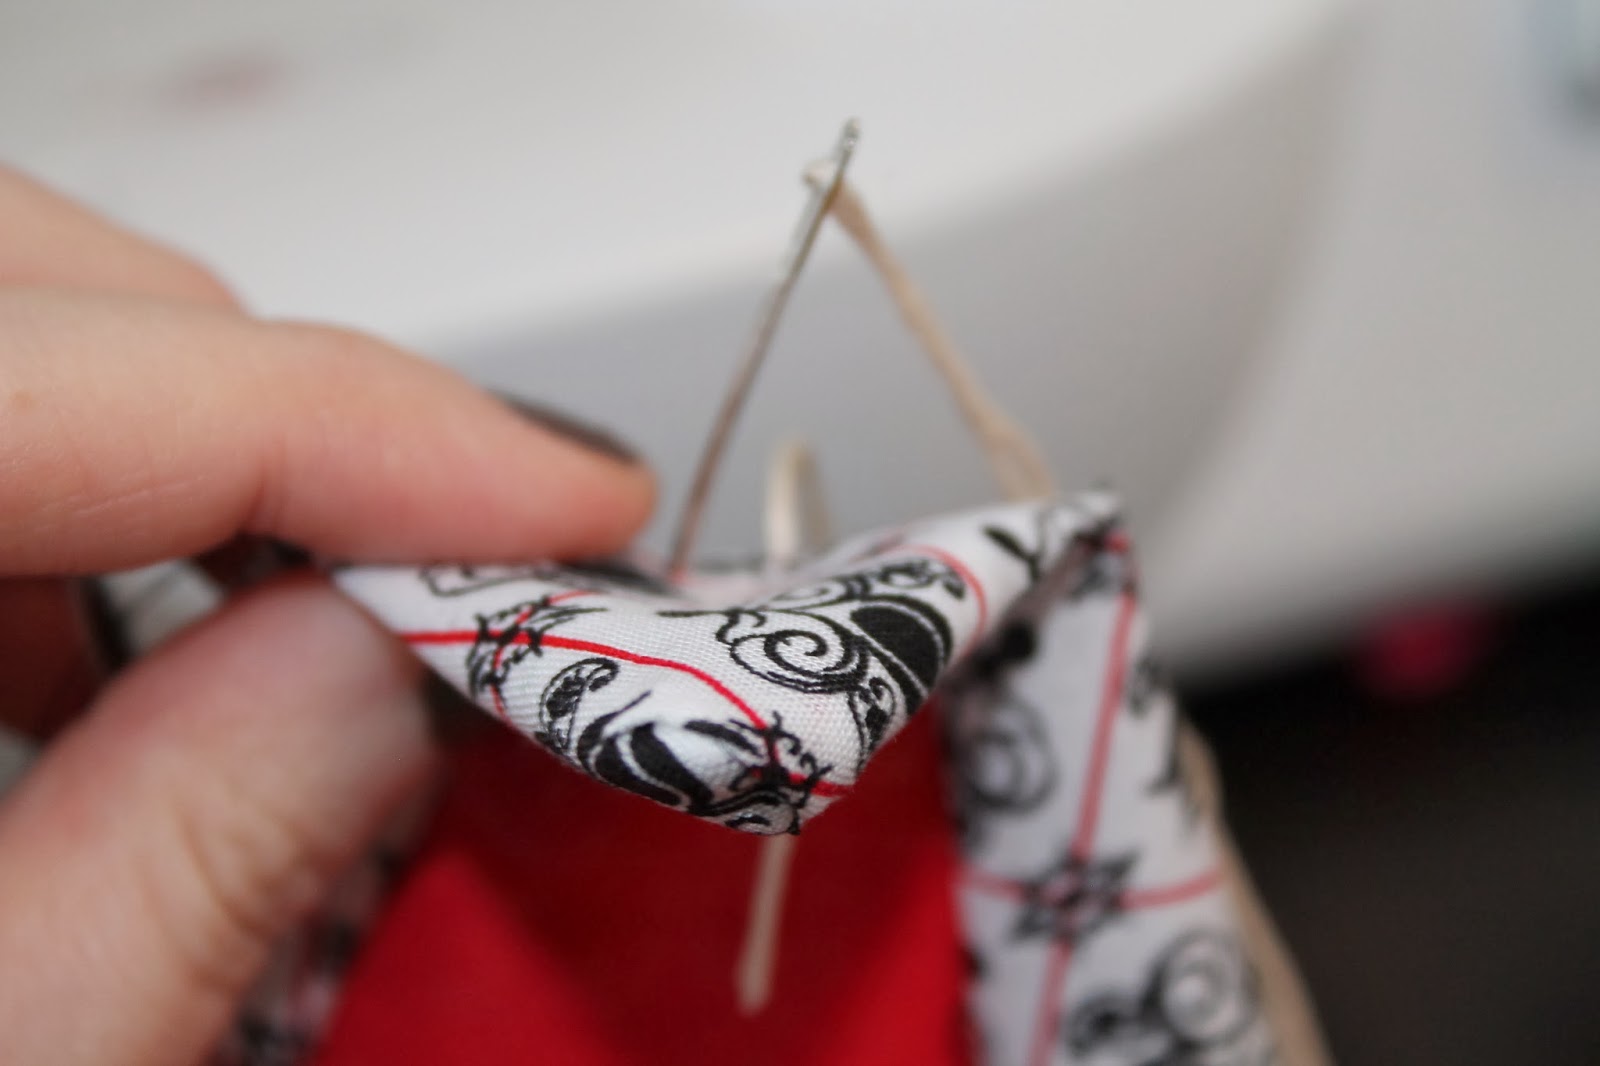
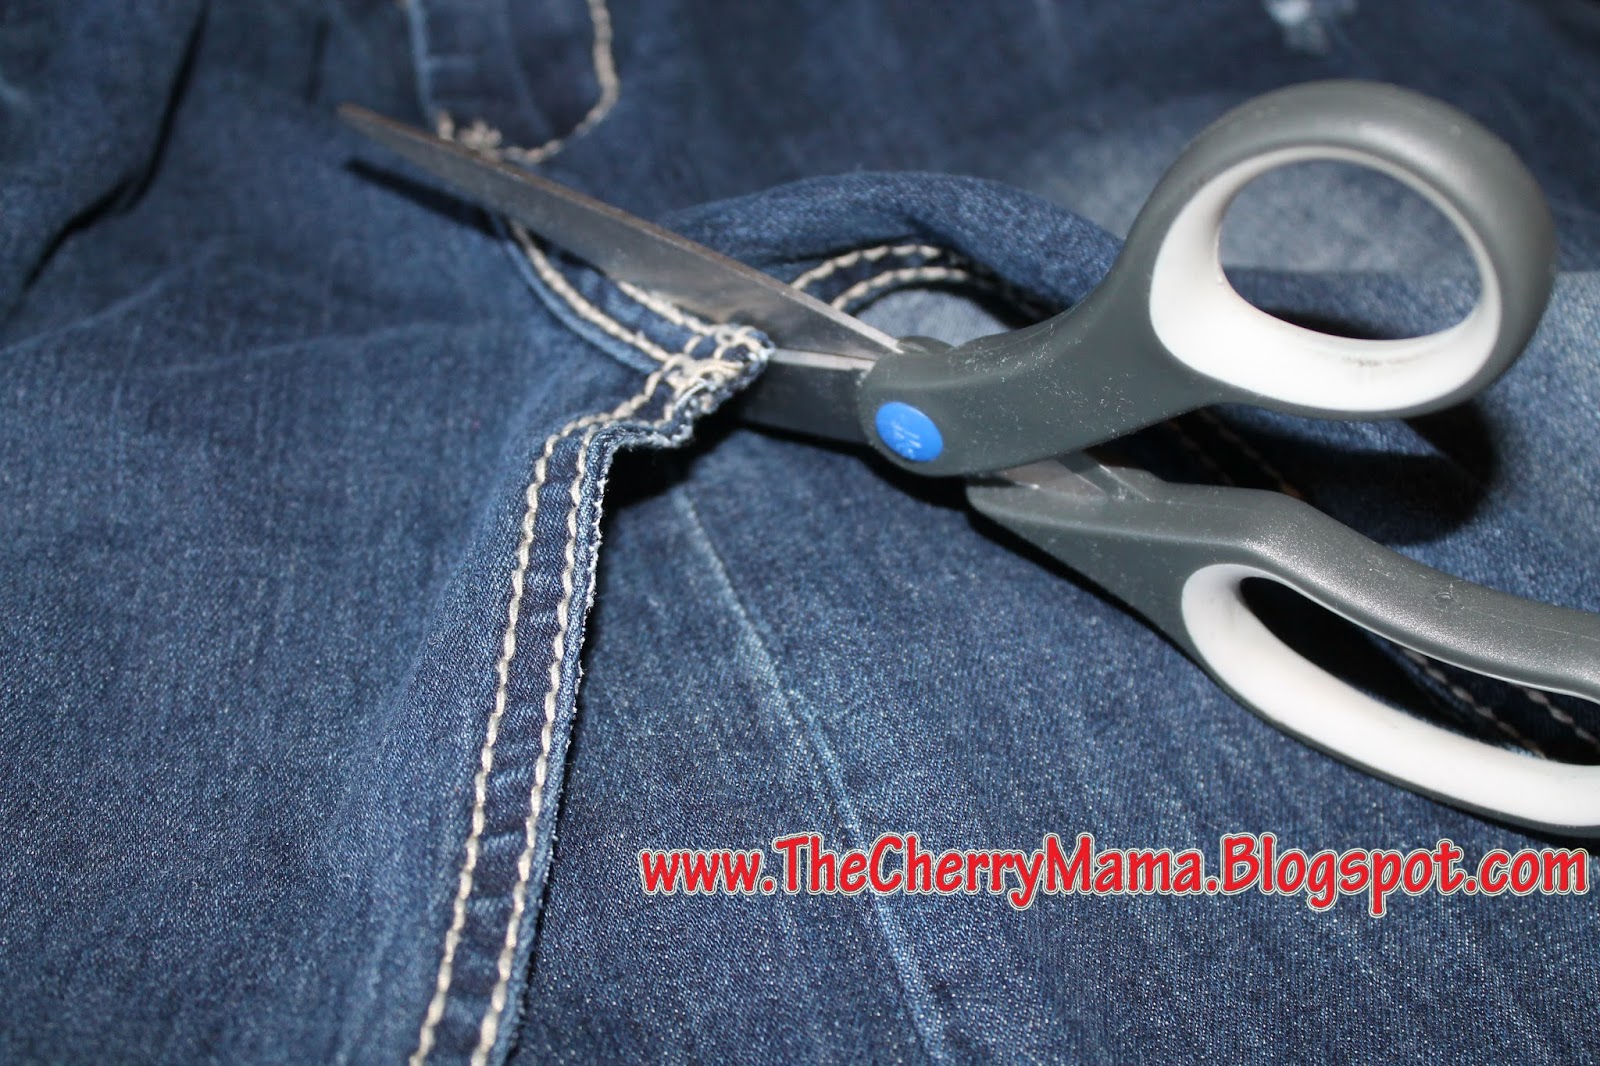
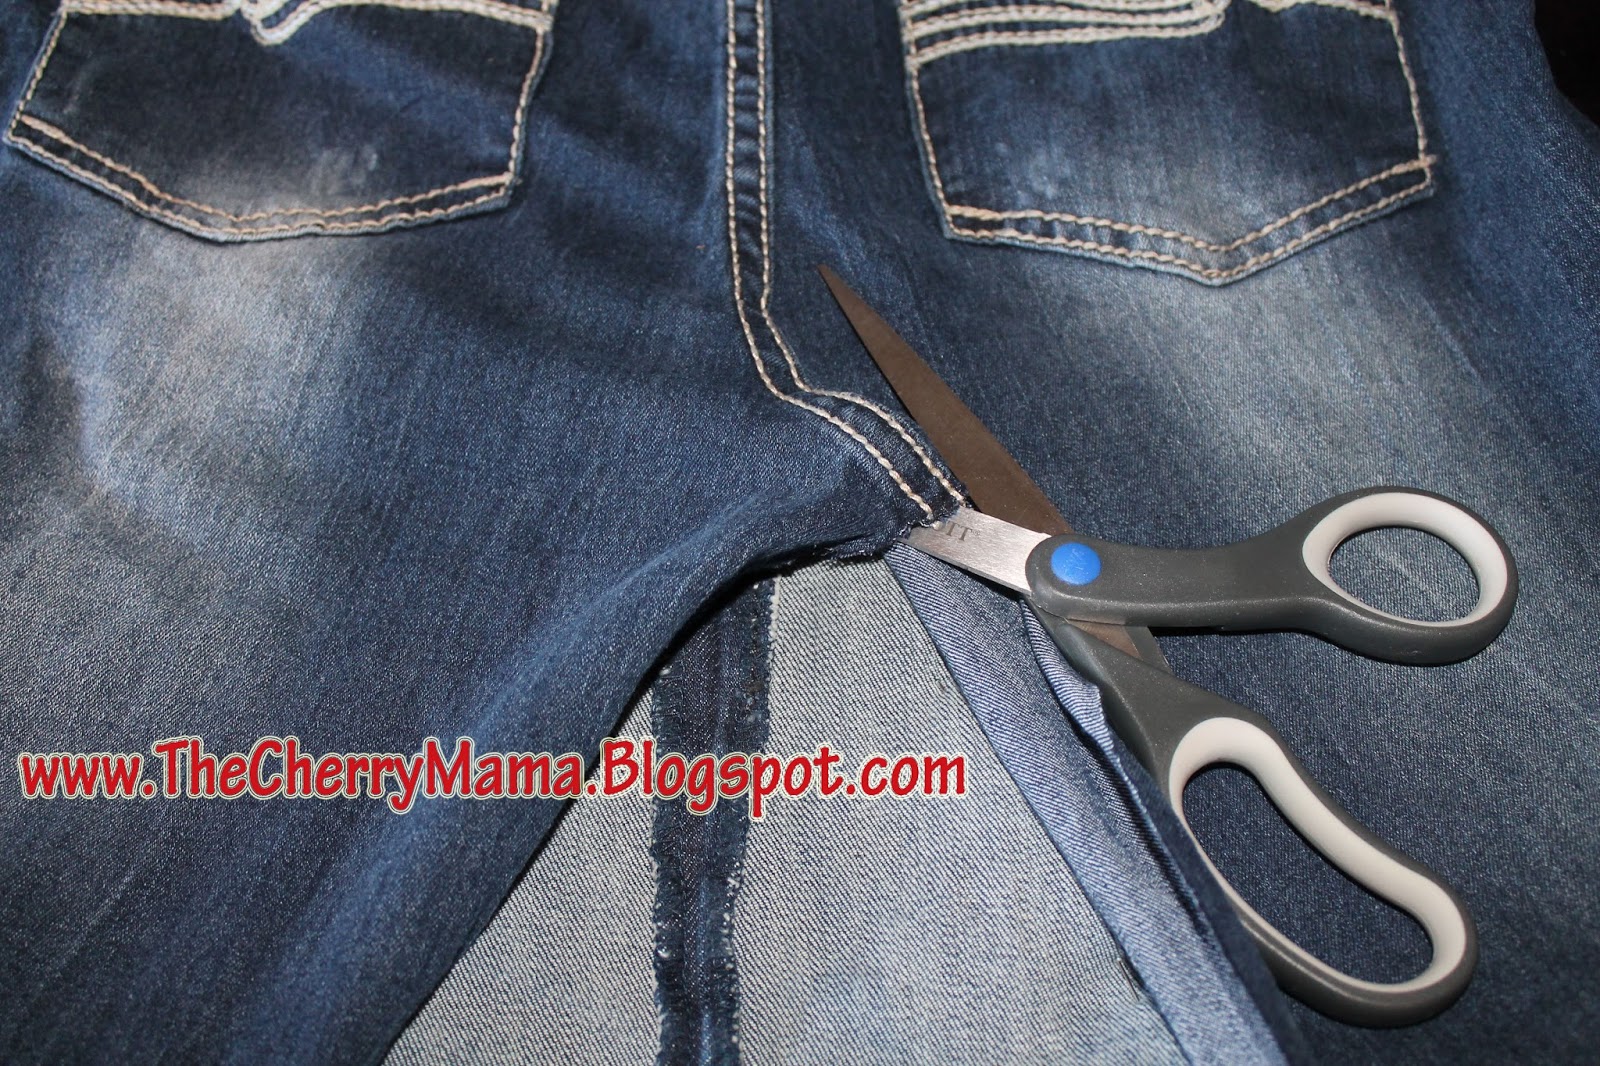
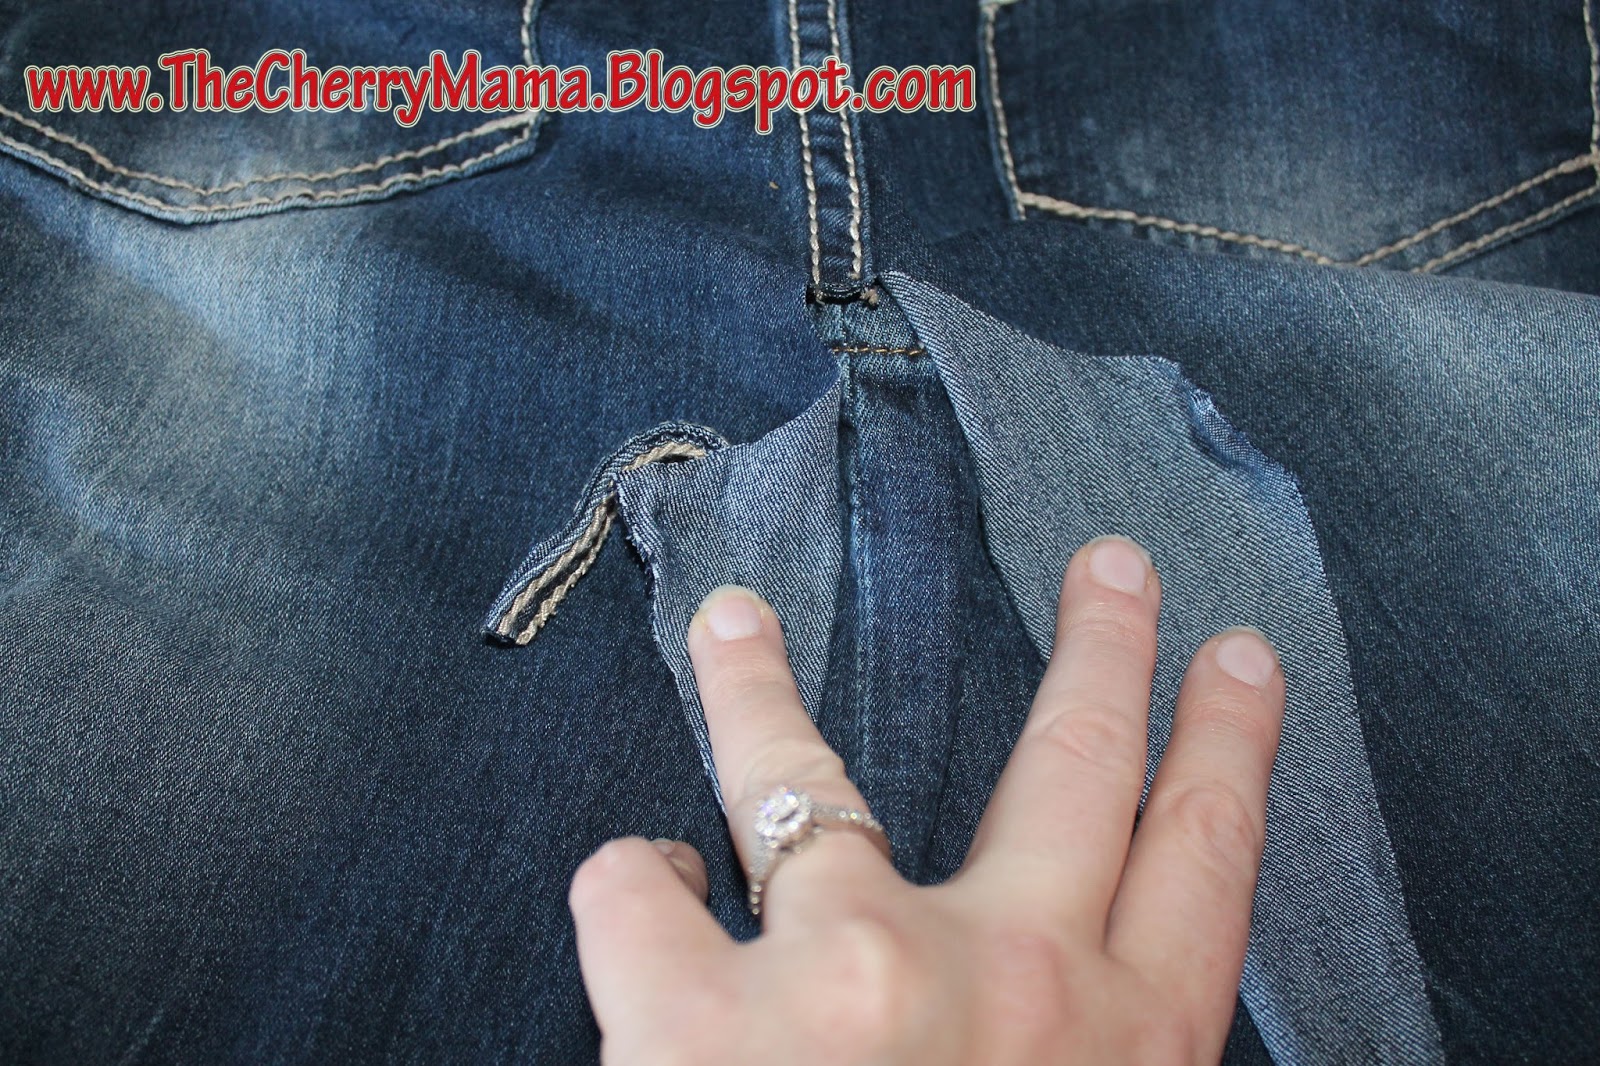
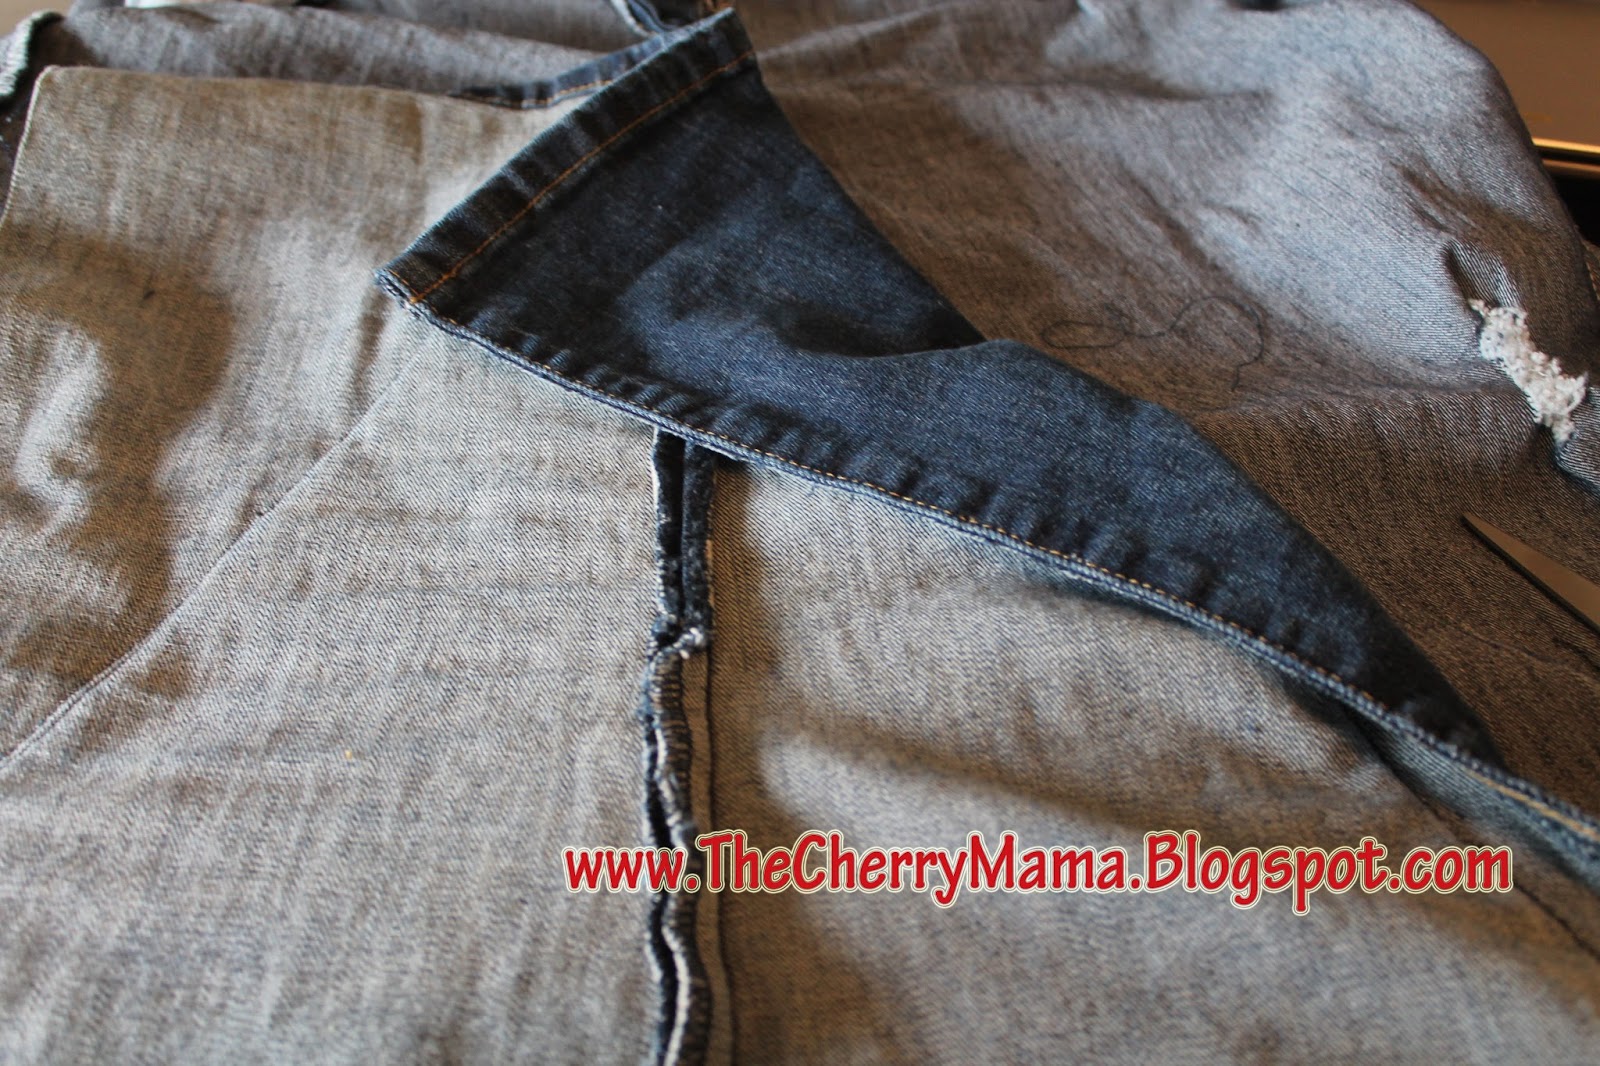
Here's a little trick! A lot of people were having a problem with the front laying flat. It's really just applying what you will be doing to the back, with a special detail. Cut up the curve just slightly, then cut out that square where all the seams come together. You want to cut enough to bring them together into a triangle so it will lay flat. 

Pin in place, and pin the rest of your skirt.
A little trick for a fuller skirt. Pinch up the middle of the patch piece, then pin.
 (Or flatten completely.) 
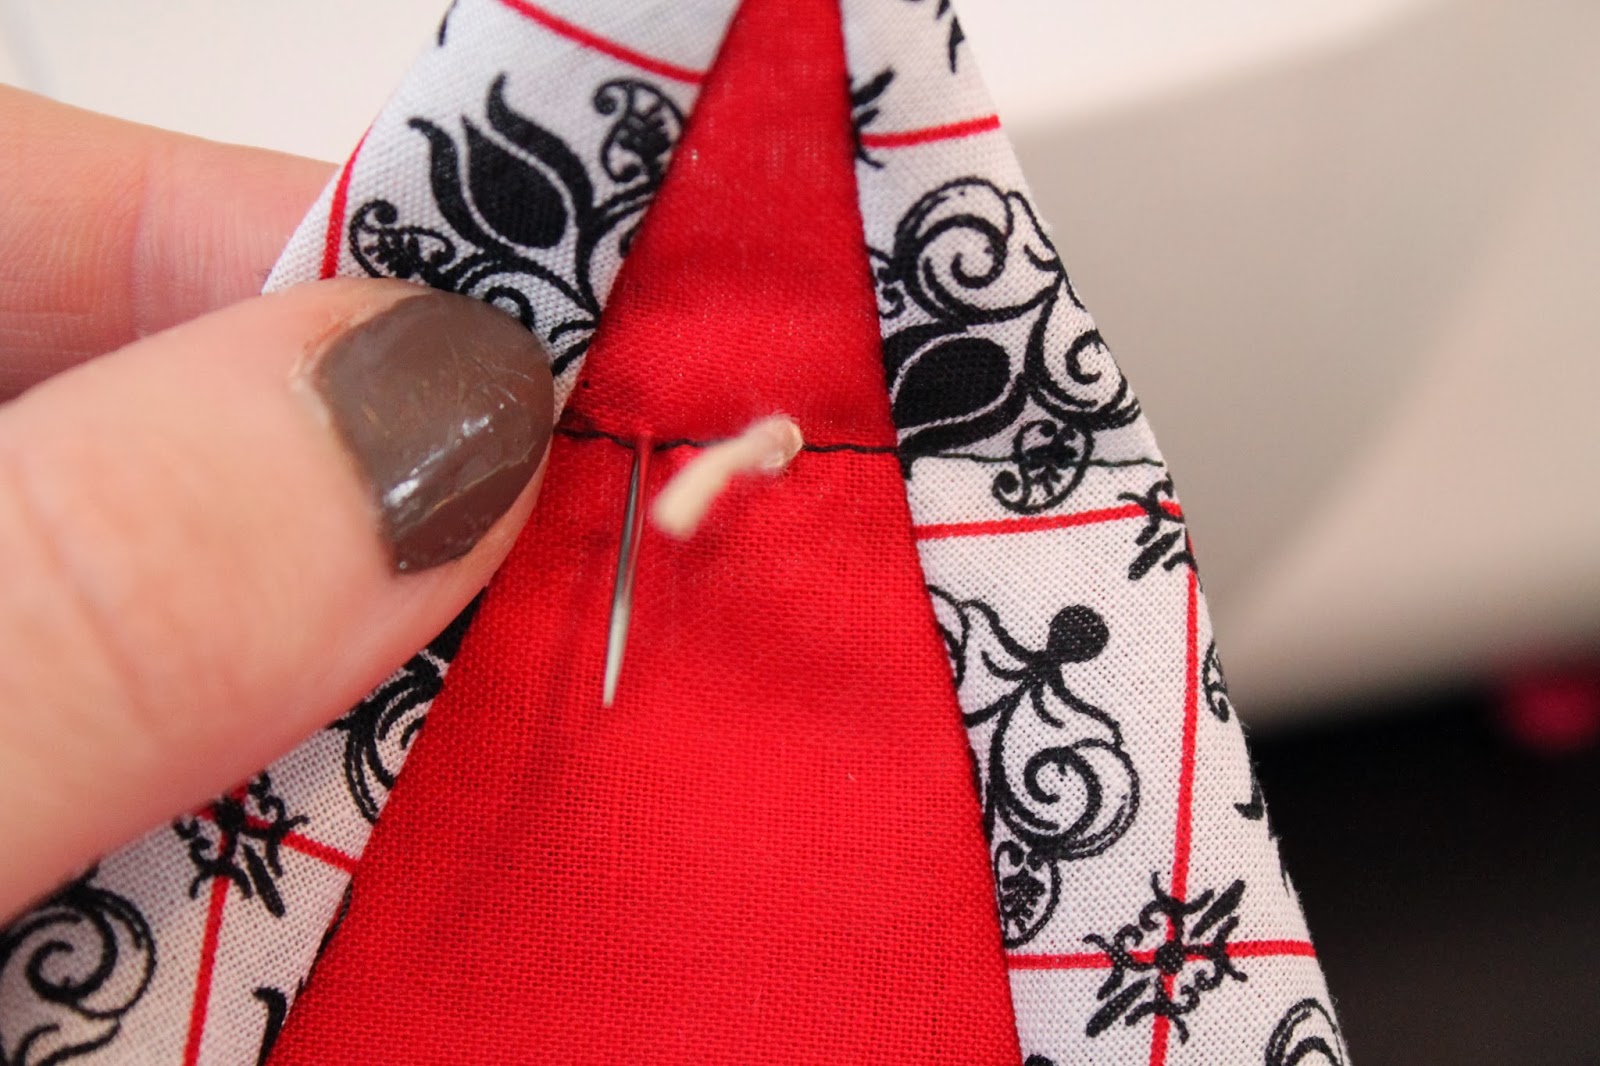
Before I started sewing I sewed the crotch by hand to ensure it was straight, 
and came together neat.
Time to sew! I chose to sew on the out side of the original pant seam. I wanted a layered look, almost like a petti coat. I also get more fraying for the Boho look.
Flip! And repeat cut up the curve on the backside. About 2 inches, or until you see it laying flat. Cut again on the other side of that seam to remove! 

You now have that extra fabric, starting at the bottom, cut to remove.
 I used a ruler and drew a line with chalk so I didn't do an 'oopsie'.

Pin (again pinching up some fabric for fullness if desired) and stitch! Again I left the raw edge and a small allowance to allow for fraying.  You can just leave the fraying for the front and tuck under a hem if you wish.
Now flip inside out and cut away all that left over fabric from the patch! 
Cur around the bottom and wash to fray. You're done!
Here is my skirt from the crop's and my jeans. These are my Instagram pics. Follow me there to see my projects as they happen. 

I have received nothing but compliments from these skirts! (Even cute old Veterans in Rascal Scooters.) LOVE LOVE. 

Saturday, August 3, 2013

One hour Antro Hack, that turned into something better.

This little ditty is about trying something new. Challenging my craft skills, and getting inspired. About taking that moment and giving it a good try! 
 I saw this pin from Anthro. I was like Ugh!  It's just not that cute, too pink ,so overpriced, so mass produced. Not for me my friends. So I was all like, "I can make that." (I know, how random I didn't even like it!) Well maybe, I have never done a jewelry challenge.
 I didn't have everything on hand. And I was not going to buy things for an Anthro 'Inspired' moment. So I dug deep into my pile of crap.( I keep lots of jewelry for their recycling purposes). And I started to pull stuff apart.
Heres what I started with. Didn't have the same, but that doesn't matter, it's an 'inspired' moment.
I ended up going more BoHo with this. Something I would wear!  I was digging around looking for some sort of chord. I found some scraps from my Mens Tee refashion. So cut the strips and braided them. 
There's nothing like an Anthro Hack challenge and beer to create something that you like.  
Go through your old jewelry, break it up. You do not have to be a jewelry maker. 
Just MaCgyver your way through.
OK, now I am warmed up, I can't wait to try this again. 
I have ideas of things to add to this, and I like the t-shirt element.
 Do you do mini challenges to get good at something?
Or, are you just a Rock Star already?

Sunday, June 23, 2013

I know we don't really need instructions at the dining room table, but...

I know we don't really need instructions at the dining room table, but...


This little project came out better than I expected. I saw this little Pin. But sorry Etsy, not for your $42 price tag. So I looked around to see what I had on hand, of course I had Mod Podge. I used some simple cardboard letters from any craft store, and I had this beautiful scrapbook paper just screamed vintage!
It was just  a matter of trace, cut and Podge! 

I did a little vintage treatment on the raw edges, using pastel chalk. I rubbed black chalk on the edges, then smeared it giving it a worn look. Doesn't have to be perfect.

I had these nifty plastic stick on picture hangers. 
Cuteness! An instant trendy kitchen update. 
You can find the Vintage 3D star Here.


Wednesday, June 19, 2013

Vintage 3D stars with Distressed Paint

How stinkin' cute are these!?


So I love to mash up ideas from Pinterest, so when I thought vaseline and cardboard I was a little skeptical on this mix. But hello fabulous!!!!
First using cardboard from a cereal box ( thin cardboard) cut your star out using this template (download).
Score it on the back so it will fold easier.

I like to smoosh it down each direction so I get a real good 3D effect.

Ta-dah! 

Paint one coat with the color of your choice. Let dry. I used acrylic, that will dry very fast.

I dug out a little Vaseline on a disposable fork to paint it in areas I would like the bottom color to show through.

Now paint your next color. Over the Vaseline and all. Don't worry about making it perfect, it's a distressed look. And again... dry! Then using paper towel wipe off the vaseline. It can be a bit tricky, ok messy! But I bent it to get a good wipe. 

For a quick hanger I just glued lightweight ribbon on the back. String or twine would work too.

And display!

Update: If you want to make larger stars here is a tutorial on how to draw a nautical star.

Follow me on Instagram for even more ideas, as they happen.